

How To Make Sgraffito Pottery
Sgraffito is a pottery technique that lets you create bold, eye-catching designs by layering slip or underglaze on your clay and then carving through it to reveal the surface underneath. It’s a simple process that leads to stunning results, and it’s easier to get started than you might think.
With roots going back to the Italian Renaissance, sgraffito has stood the test of time. Today, it’s loved by potters of all skill levels for its ability to add detail, texture, and a personal touch to any ceramic piece.
Whether you’re just getting started with pottery or you’re an experienced artist looking to try something new, this guide will show you how to make sgraffito pottery using the right tools and techniques, step by step.
What is Sgraffito Pottery?
Sgraffito is all about carving with purpose. The word comes from the Italian sgraffiare, meaning “to scratch,” and that’s exactly what you do; scratch through a layer of colored slip or underglaze to reveal the clay underneath. The contrast creates bold, eye-catching designs that stand out on any piece.
This technique has been used for centuries, especially during the Italian Renaissance, and you’ll still see versions of it in pottery from around the world. It’s a method that’s stood the test of time because it’s simple, hands-on, and packed with creative potential.
What sets sgraffito apart? Instead of adding color or texture on top, you carve into the surface to bring your design to life. It’s a great way to add detail and dimension, whether you’re working on a mug, plate, or sculptural piece.
Materials and Tools You’ll Need
Before you start carving, you’ll want to make sure you’ve got the right materials on hand. Having the proper setup not only makes the process smoother, it also helps you get the clean, detailed lines that make sgraffito pottery stand out.
Clay
Start with a smooth clay body that can hold detail well. Stoneware and porcelain clay are great choices, especially when working at the leather-hard stage. Avoid heavily grogged clay, since rough textures can interfere with carving.
Slip or Underglaze
Sgraffito gets its bold contrast from layering color over your clay. You can use:
-
Colored slip for a softer, more traditional look.
-
Underglaze for brighter color options and better consistency across firings.
Use a soft brush and apply 2–3 coats. Just make sure your piece is leather-hard so the surface holds up during carving.
Additional Supplies
-
Sponges: For smoothing the surface before applying slip.
-
Soft brushes: For applying underglaze cleanly.
-
Clear glaze (optional): To finish your piece after bisque firing.
Sgraffito Tools
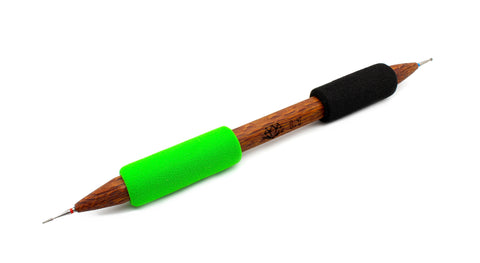
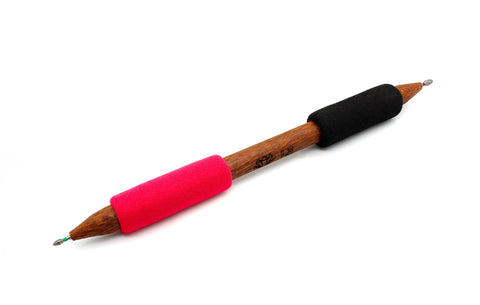
This is where the real magic happens. The right tools make a big difference, especially when it comes to control and comfort. That’s why we designed our DiamondCore® stylus tools specifically for detail work like sgraffito.
| Tools | Tip Types | Best For | |
|
L1 Diamond Stylus Tool | Needle / 1mm Ball | Fine lines, freehand detail |
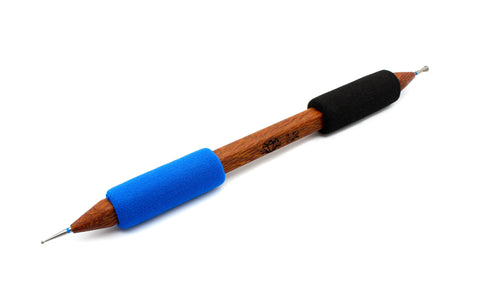
|
L2 Diamond Stylus Tool | 0.7 mm Ball / 2 mm Crown | Smooth arcs, controlled depth |
|
L3 Diamond Stylus Tool | Small & Large Football | Texture, curved lines, wider detail |

|
3-Piece Stylus Set | All of the above! | A great starter set for exploring different styles |
Each tool features durable diamond tips and comfortable foam grips, so you can carve with confidence, without hand fatigue.
Step-by-Step Guide to Making Sgraffito Pottery
1. Create Your Pottery Piece
Start by shaping your clay into a form you’re excited to work on. Whether you're throwing on the wheel or hand-building, just make sure the surface is smooth. Sgraffito designs show up best when there’s no texture competing with your lines.

Basic Shapes for Beginners
If you’re just getting started with sgraffito, simple shapes with wide, flat surfaces will give you the most room to carve. Here are a few beginner-friendly ideas:
-
Flat wall tiles or coasters: Great for practicing patterns and line work
-
Small dishes or pinch pots: Easy to shape and perfect for trying curved surface carving
-
Mugs or tumblers: Offer a good balance of form and surface area for designs
Inspiration for Experienced Artists
If you’re comfortable with more complex forms, try working sgraffito into shapes with curves, angles, or added elements:
-
Vases with narrow necks or flared rims: Show off detailed wrap-around designs
-
Lidded jars or boxes: Add carved accents to both base and lid for a cohesive look
-
Sculptural forms or slab-built vessels: Let your design flow across planes and edges
No matter your skill level, the key is choosing a shape that lets your design breathe. Keep your surface clean and even, and make sure the piece reaches the leather-hard stage before moving on to underglazing and carving.
2. Allow Your Pottery To Become Leather-Hard
Leather-hard clay is dried out but still has some moisture, and this is what you’ll be looking for when creating sgraffito pottery. Although you can’t shape the clay anymore, it can still be carved or scratched. Finding the right point where you can start carving your piece can be a bit tricky. If the clay is too hard, you won’t be able to make the correct carvings, and your underglaze will crack or flake off once applied. If it’s too wet, your clay piece will collapse and deform when you try to carve it.
To know if your clay is leather-hard, pick it up and ask yourself these questions. Is it firm enough to hold without feeling like it will crumble? Does it leave a small mark if you press your fingernail against the clay? If yes, you’re ready to move on to the next step in the sgraffito process.

3. Apply The Underglaze
Once your clay reaches the leather hard stage, it is time to add some color. This is where you will apply your underglaze. Just make sure the surface is smooth and clean before you begin.
There are a few different ways you can apply underglaze, depending on the look you want and the tools you have available:
-
Brush: Great for control and layering color
-
Dip: Offers quick and even coverage for smaller pieces
-
Pour: Works well for bold, full coverage designs
-
Spray: Ideal for smooth transitions and soft finishes
If you want to experiment, try using two different colors of underglaze. You can reveal different tones as you carve by adjusting the pressure, which adds more depth and interest to your design.
A few helpful tips:
-
Apply 2–3 coats for a solid, opaque color.
-
Use a soft brush for a smooth, even application.
-
Allow each layer to dry slightly before adding the next to prevent streaks or smudging.
-
Since leather-hard clay is still porous, you may need a bit more underglaze than usual to get full coverage.
Once your final coat has dried to a touchable matte finish, your piece is ready for design and carving.

4. Sketch Your Sgraffito Design
Before you begin carving, it is helpful to plan your design. If you are aiming for something detailed or symmetrical, try sketching it on a piece of tracing paper first. You can then transfer the design onto your pottery to make the carving process easier and more accurate.
If you are new to sgraffito, it is best to start with something simple. Clean lines, floral shapes, and repeating patterns are great choices for beginners. A soft pencil works well for lightly marking your design on the clay surface. If you make a mistake, do not worry. Any light pencil marks will disappear during firing.
Here are a few ideas to inspire your design:
-
Simple leaf or vine patterns
-
Starbursts or mandalas
-
Abstract lines and geometric shapes

5. Carve Your Design: Sgraffito Techniques
Now comes the most rewarding part of the process. Carving your design is where your piece really comes to life! Sgraffito is similar to drawing, but instead of using a pen or pencil, you are removing underglaze to reveal the clay beneath.
The right sgraffito tools make a big difference. You want tools that feel good in your hand and give you the control to carve with confidence. That is where DiamondCore Tools really shine.
Best Tools for Sgraffito Pottery
Every design is different, so choosing the right tip style helps you get the look you are going for. Here are a few of our favorite tools for sgraffito:
-
For very fine lines and tiny details, the L1 Diamond Stylus Tool has a diamond needle tip on one end and a ball tip that measures one millimeter on the other. It is a great choice for sketching designs or adding delicate line work.
-
For smooth curves and rounded shapes, try the L2 Diamond Stylus Tool. It features a ball tip that is zero point seven millimeters and a special crown-shaped tip for soft, flowing lines.
-
For bold lines and textured areas, the L3 Diamond Stylus Tool has two football-shaped tips. One is small and the other is larger, which gives you a lot of variety when adding movement or contrast to your design.
-
If you want the full range of carving options, the Three Piece Sgraffito Stylus Set includes all three tools and is perfect for artists who want to experiment with different effects.
All of these tools feature a natural wood handle with a soft grip for added comfort and control. They are easy to use and built to last, even during longer carving sessions.
Sgraffito Carving Tips
-
Start by lightly sketching your design on the surface
-
Carve slowly and vary your pressure to show different layers of underglaze
-
Keep a soft brush nearby to gently sweep away loose clay
-
Clean your lines as you go to keep the design crisp
This is your chance to add personal style and detail to your piece! There is no rush. Enjoy the process and let your design take shape one line at a time.
6. Finalize Your Sgraffito Project
Before firing, take a moment to check your piece. If you notice any sharp edges or rough spots, smooth them out with a pottery sponge or detail tool. This helps keep your work clean, polished, and safe to handle.
If you need to fix an area where the underglaze came off, now is a good time to touch it up. Just be sure it dries fully before you move on.
Let your pottery dry until it reaches the bone-dry stage, then fire it for the first time. Most clay bodies do well with a bisque firing between cone zero four and cone zero six.
Once bisque fired, apply a clear glaze. A glossy finish will brighten your design, while a satin or matte option offers a softer feel. We recommend using a clear glaze that works at cone five or cone six, especially if your piece is functional.
Finish with a glaze firing based on your glaze and clay body. Once your kiln cools down, you will have a finished piece that shows off all the carving and color you worked so hard to create!
Common Sgraffito Mistakes and How to Avoid Them
Sgraffito is a rewarding and creative process, but a few small issues can impact your results. Here are some common mistakes we see, along with simple ways to avoid them and get the clean, bold designs you want.
Carving Too Early
If the clay is too soft, your lines can smear or drag instead of cutting cleanly. Wait until your piece feels leather hard. It should be firm enough to hold its shape but still soft enough to carve. A gentle press with your fingernail should leave a small mark. That is a good sign you are ready to carve.
Underglaze Cracking or Flaking
When underglaze dries too quickly or is applied over clay that is too dry, it can crack or peel as you carve. Work in a space without direct sunlight or strong airflow, and let each layer settle before applying the next. If needed, mist the surface lightly to keep it workable for a little longer.
Glaze Turning Cloudy
Some clear glazes can fire cloudy and take away from your design. For the best results, choose a clear glaze that is rated for cone five or cone six and known for staying transparent. If you are trying a new glaze, it is always smart to test it on a small piece first.
Not Enough Underglaze
If your design looks washed out after carving, you may not have used enough underglaze. Apply two or three coats for full coverage and strong contrast. Let each coat dry a little before moving to the next to avoid smudging or uneven color.
Rushing Through the Steps
Sgraffito is about intention and detail, not speed. Take your time as you apply color, let it dry, carve, and glaze. Each step adds to the quality of your final piece, so slow down and enjoy the process.
Every potter runs into a few challenges along the way, but each piece is a chance to learn and grow. With a little patience and the right tools in hand, your designs will keep getting better.
Your Sgraffito Journey Starts Here!
Sgraffito is one of those techniques that feels just as fun as it looks. From preparing your clay and applying underglaze to carving out bold designs and finishing with a clean glaze, each step gives you a chance to bring your creative vision to life.
To recap:
-
Start with a smooth clay form
-
Let it reach the leather-hard stage
-
Apply two or three coats of underglaze
-
Sketch your design and carve with care
-
Let it dry, bisque fire, glaze, and fire again
Whether this is your first time trying sgraffito or you are looking to refine your technique, the right tools and a little patience go a long way.
Looking for high-quality carving tools designed just for sgraffito? Explore our specifically designed sgraffito tools to find your perfect match.
We can’t wait to see the sgraffito pottery you create! Give us a link to check out your work in the comments below, or tag us on Facebook or Instagram!
Judy – We think @simplysands_ceramics process is amazing too! This artist applies wax on the outside of their cup, then uses our sgraffito tools to carve through the wax and surface of the piece. When they apply underglaze to their cup, it’s absorbed into the grooves but not where the wax remains on the rest of the piece. She then wipes away excess glaze, leaving the colored grooves. You can see another example of their wax-resist and glazing technique in this post: https://www.instagram.com/reel/C3s3gLiAK6L/
On the multicolored bowl above, what is the application process for the various underglazes? Its so lovely….
Leave a comment