Mastering the Coiling Pottery Technique: Tools, Tips, and Artist Insights
Whether you're new to pottery or revisiting hand-building methods, the coiling technique is a timeless pottery method. For creating everything from functional wares to sculptural masterpieces, coiling gives you complete control over form and texture and provides a tactical creative experience.
What is the Coiling Technique?
The coiling technique in pottery involves rolling out long, rope-like coils of clay and stacking or layering them to build up your ceramic piece. Depending on your desired finish, you can blend the coils together for a smooth surface or leave them exposed to highlight texture and movement.
Unlike wheel-throwing, coil pottery techniques require no pottery wheel and minimal tools, making them perfect for artists of all skill levels who enjoy handbuilding.
Essential Pottery Tools for Coiling
While the coiling technique is relatively simple and doesn’t require many additional tools, a few tools can help elevate your coil work and make the process a little smoother.
Clay Cutter/Wire Tool
Use a clay cutter or wire tool to slice clean, even chunks from your clay block—streamlining your process and reducing waste.

Pottery Ribs
Ribs can help you shape and compress your coils or smooth them out as you create, giving your finished piece a more professional and polished look.

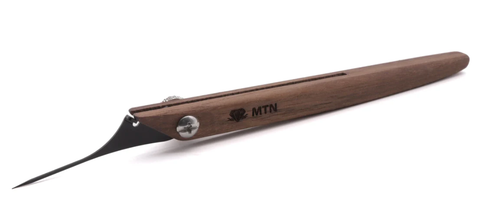
Scoring Tool or Needle Tool
Scoring and needle tools are handy when using the coiling pottery technique. They can help you secure each coil to the next by scoring and slipping as you build your clay structure.


Sponge
Keep your clay workable by maintaining the right moisture level and smoothness. Pottery sponges are great for hydrating surfaces, refining textures, and smoothing imperfections as you build.

Give the Coiling Pottery Technique a Try
If you’re new to ceramics or haven’t tried the coil technique before, it’s a fun experience. Let’s walk through the process step by step.
1. Prepare Your Clay
Properly preparing your clay is key to even and smooth coils. Wedge your clay thoroughly to eliminate air bubbles and focus on creating a consistent texture.
2. Roll Your Clay Coils
Now comes the fun part! Roll out the coil ropes with your hands or use a rolling board. You want to do your best to make the ropes a uniform thickness to avoid weak spots or inconsistencies in your design.
3. Build Your Base
You can use a slab or rope spiral as the foundation for your piece. Score and slip the edges to securely bond the next layer of coils.
4. Stack and Join Coils
To build your structure, layer each rope in a coil. To join them together, gently press and score the clay. As you build upward, you may need to support from the inside with foam, newspaper, or internal coils to prevent sagging.
Depending on your design, you can use a rib or your fingers to blend and adjust the positioning of each coil. Manipulate the clay to form curves, flares, and so much more.
To achieve symmetry or consistent forms, use profile templates or sketch your intended shape before building.
5. Refine and Smooth
As you finish your piece, think of the look you want. Use a rib and damp sponge to smooth the surface for a more polished look. Or leave the coils visible for a rustic, organic texture.
Embrace Coil Pottery With DiamondCore Tools
Whether you're crafting functional pieces or expressive forms, coiling is one of the most popular and beloved techniques. The process encourages you to slow down and get hands on with the clay. With the right tools and an open mind, creativity is unlimited.
If you’re looking for high-quality pottery tools designed for handbuilding and coiling or a community of fellow artisans who love experimenting with clay, you’ve come to the right place. Shop now or follow us on Instagram to stay connected and learn more pottery tricks.


Leave a comment